Showing posts with label furniture makeover. Show all posts

Thursday, October 4, 2012

Furniture Makeover :: From Cedar Chest to White & Distressed

*Sigh. I'm behind again. I have SO many fun blogs I want to share with ya'll.... DIY projects, pics from a precious baby shower, a Fall giveaway, and more! But we've just been so darn busy around here! Between work, 3 weddings (in 2 different states), and hosting a weekly community group at our house, things have been a little crazy. But in an effort to catch up, let's do another quick furniture makeover, shall we?

This little beauty was $99 at my local thrift store. (Typically way more than I would spend on a project, but it was REAL cedar from the 1940's, and she just had such beautiful lines!)


I snatched it up for one of my friends, and in my haste I didn't notice that there was a chunk missing from the trim...


Super frustrating! I am normally so careful about choosing pieces that only require a little wood putty (if any repairs), but she was already bought and in my car so I, of course, responded with the 7 words I've said at least a million times in my life...

I'm sure my Dad can fix it!

And he did! I assumed he would find a similar piece of trim and glue it on. But no, SuperDad decided that he would instead carve a new piece of wood to replace the missing trim. Yes, that's right. He handcarved a matching piece! Impressive, no?


Next up was sanding and wood puttying not just scratches, but someones driver's license # that was carved into the top. (I'd seriously like to slap the punk that carved into this beautiful chest.... who does that?!)


Then I painted 2 coats of Annie Sloan's Pure White....

 
 did some light distressing....

 
... added clear wax, and TA-DA!!!


Isn't she beautiful? She recently went to live in Baby Gia's room, along with the spotted shelf, and my pretty purple table!


Speaking of Baby Gia, her parents (and our dear friends) Malerie & Kevin leave Saturday at midnight to go get her from Korea! We are just so, so thrilled for them, and we can't wait to meet their precious baby girl! If you think about it, say a prayer for them as they travel (and for Gia as she is about to experience a potentially traumatic time of transition). I know they would appreciate your prayers! You can pop over to their blog to read more of their story here :: http://malerieandkevin.blogspot.com/

Friday, September 14, 2012

Furniture Makeover :: A Spotted Shelf

It's been a while since we've done a furniture makeover... so let's do a quick one, shall we? (I promise an even better one is coming soon!)

This little bookshelf was brought to me by my friend Malerie, for her little girl Gia (who should be coming home from Korea any time now!) She wanted some additional storage for her room, so we decided to make this little bookshelf a little more girly. While I think it turned out cute, I am not convinced it's going to hold up well... so while I do my "reveal" I'll also share with you a few things I would've done differently if I had this project to do over. (You might as well learn from my mistakes... right? ;)

First - we started with a sort of wood composite shelf. It wasn't real wood, or even veneer. It felt more like cardboard with a woodgrain sticker on it than anything else. (You know the kind of shelf I'm talking about? I think we've all had a similar one at some time in our life!) I'm pretty sure this was mistake #1.


Annie Sloan Chalk Paint says it can cover ANYTHING - glass, plastic, veneer, metal, etc - and so far I've believed it to be true. But I struggled some with this piece. There were places it "bubbled" and pulled away from the finish when I painted it on. It took a lot of strokes with thick paint and a lot of coats to get an even finish.  I did finally manage to get it all painted white, and waxed... so then we were on to Step 2.


I don't have pictures of the next few steps (they were that stressful) so just stay with me as I tell you mistake #2, okay? In an effort to make this piece girlier (is that a word?) I had suggested Mod Podging some bright wrapping paper on the inside of the back of this piece, so it would peek out from around her books.  So Malerie picked out a pretty polka-dot pattern and I went to work!

Let me tell you that I love Mod Podge... until I actually use it again and then I remember how much I hate it. Mod Podge is great for small projects, but I keep trying to use it for big ones. And Mod Podge + a big sheet of thin wrapping paper is a disaster waiting to happen! It took 2 tries to get a piece cut out the right size without punching a hole in it before I got it in place. Then, when I tried to Mod Podge it on, I got wrinkles EVERYWHERE! At that point though, there was no going back. So I finished it up, put a ridiculous number of Mod Podge coats OVER the wrapping paper, and let it dry. And here's the finished product!


I think it turned out pretty cute, but I'm not sure how well it will stand up to wear and tear. If I had this project to do over I would make these changes ::

#1 - Start with a real wooden shelf - or at the very least, a veneer shelf. No pressed wood or wood composite.

#2 - Instead of Mod Podging wrapping paper (which is thin and easily tears/wrinkles), I would suggest a pretty fabric! It will be much easier to work with and it should hold up better as backing. Wallpaper would probably be an okay option too (just be sure to Mod Podge over it as well as under it.)

#3 - I would probably paint a polyacrylic coat to seal a bookshelf, instead of using wax. I haven't tried this yet (so I can't recommend a brand or method) but I have a friend who uses polyacrylic with her Annie Sloan Chalk Paints. I just think it would stand up better to the wear and tear of books being pulled in and out of the shelves.

So... if you're looking for an easy way to customize a bookshelf, this is a great technique! Just make sure you learn from my mistakes, and you'll have a finished product that will hold up even better over time. :)

Sunday, August 5, 2012

Furniture Makeover :: My Striped Side Table

Before I reveal my latest furniture makeover, let me just say a quick thank you to everyone for your sweet comments on my last blog (and facebook). I can't even begin to express what it meant to have so many of you say you'd be praying for our sweet Kate. We can't wait for her to meet all of you!

I'm looking forward to doing some furniture makeovers for her room someday, but for now I'll stick to projects to sell. ;) My latest was a pretty striped side table for a friend in Oxford, AL. I got my inspiration from this blog - and I knew as soon as I saw her coffee table that I wanted to do a few similar pieces. I started out with this rough looking table from the thrift store...


It was shabby looking already, and I knew it would look great with some big mustard stripes! But first - I had to have some help from my awesome Mr. Fixit Dad. For some reason - the table top was on a Lazy Susan! (So weird, right? I have no idea why you'd want your side table to spin?!) Someone had tried to fix it with nails and screws in the corner and it looked terrible. Dad fixed it (the right way) by replacing the screw holes with wooden dowels and adding brackets underneath. Then I got to painting!

I did 2 coats of Annie Sloan's Pure White - then taped off my stripes and painted them in Arles. Next, I distressed the edges and the top with sandpaper and chipped off some areas to give it a shabby chic look. After a couple of coats of clear wax it was done!


When I sanded to distress it, some of the original paint (a cream color) came through. I really love the way it aged the piece!


Isn't she a beauty?! This is definitely one of my favorite pieces I've done so far. I recently found a coffeetable that I'm planning to paint the same way. (If anyone is interested in buying the coffeetable - be sure to contact me!)

*For those of you on Pinterest, I recently joined and created a board for my Furniture Makeovers. If you'd like to follow me there - just click this link!

Thursday, July 26, 2012

Furniture Makeover :: Bringing Back Woodgrain

Today I've got a little bit of a different furniture makeover for you! This time, I didn't paint my piece - I decided to try my hand at bringing back the woodgrain of a badly damaged end table. I figured if I failed - I could always paint over my mess!

I started out with this $10 table I found at the Super Thrift Store in my hometown. My initial idea was to do chevrons on the square top and sell it - but when I brought it home I realized it had similar lines to our coffee table.


Though you can't see them here, it even had tiny metal casters like our coffee table!
{The Aiden from World Market - shown below}


It also filled the space between my 2 black chairs much better than my little purple table - so I decided to refinish it as an addition to our living room. (The purple table was sold to my friend Malerie for her little girl's room!)

I started by flipping it over and pulling the veneer off the bottom. It was in terrible shape - splitting everywhere - and you could see it even when the table was right side up. Luckily it was in bad enough shape that it came off pretty easily. I only had to use a knife on a couple of spots.


Next I sanded the bottom and wood-puttied a couple of chunks missing below the veneer (there were apparently multiple layers of wood and wood veneer).


Being the professional I am, I forgot to buy a wood putty knife (is that what they're called?) Lesson learned - a silver Christmas cheese knife will totally do the trick!


After that I flipped it over and took to sanding. Now let me say - hating sanding is the #1 reason I use Annie Sloan Chalk Paint (no sanding required!) But just this once I thought I'd give it a try. I "roughed up" the whole piece with a medium grit sandpaper - sanding the top the most because it was the area with water rings. Had it not been a wood veneer piece, I probably would've sanded it more - but I was afraid I might sand a hole completely through the veneer. So, once it was pretty well sanded I took a swipe at adding wax.


I decided to restain this piece by using my Annie Sloan Dark Wax. After the first coat on the top I knew I hadn't sanded enough. The finish was really uneven because there were areas where I'd left the stain/sealant behind that turned a different color. I probably could have stopped here and tried to sand off the wax and more of the top - but again, I was afraid of sanding a hole in the veneer. So I continued on - waxing the whole piece and hoping for the best. I ended up doing 3 layers of dark wax (wiping them off with cheesecloth in between) on top - 1 layer of dark wax all over - and 1 layer of clear wax all over. And here's the finished piece!


The finish on the top is still uneven - but you really can't tell when I have my lamp, magazines, etc on it. (I'm thinking of adding a plant to the back right corner too!) Overall I think it looks way better than it did originally, and I love that the dark wax gave it a darker, richer finish all over.


This piece is such a great size, and I think it makes this little nook so much more functional! It's big enough to work as extra seating when we have get togethers  - you could totally fit drinks and plates on this for the 2 people sitting by it. I love the bottom shelf - it would be the perfect place for a basket of blankets! I also think it helps bring the wood tones from the rest of our living room into this space. You can see the other sitting area here... (before it was flooded that is!)


What do you think? Have you ever refinished a wood piece? Any tips for other DIYers of wood furniture? What kind of {easy to keep alive} plant should I buy for my new table?

Wednesday, July 11, 2012

Furniture Makeovers :: A Chest or Two

I have been a busy bee with my paintbrush (it's been nice to have a hobby to take my mind of this) and today I've got 2 new furniture makeovers to show you (one of which is for sale! Get excited!!!) We'll start with the piece I re-did for my mom when we went home for the 4th of July!

Mom found this cedar chest at the thrift store, and decided it was the perfect thing for the foot of her bed. She'd been talking about getting a bench so she and my dad had a place to sit and put their shoes on, and this one was perfect (because it's a bench + storage!) It was real cedar and in good shape - except for the finish.


I know you can't tell from that top pic, but there were lots of nicks and scratches in it from use, dribbles of black stain down one side, and red and blue paint in several places. On top of those issues - my mom hated the color of the wood and stain. My aunt warned her not to paint it, and my dad swore he would refinish it and stain it darker... but my parent's basement is full of Dad's project (he is Mr. Fixit and always has too much to do!) and we knew it would be a while before this one would get done. So Mom & I took matters into our own hands! (Sorry Dad & Aunt Tammy!)

[For the record - I adore real wood pieces! But if the finish really needs work and the piece doesn't have any sentimental value, then I say paint it! What's the use of throwing another terrible piece of wood furniture "in need of work" in your basement, when a coat of paint will make it beautiful (and useable) again?]

It only took an hour or two to give this chest a couple of coats of paint. Mom was shocked at how well the paint covered (and how quickly it dried!). It got dark pretty soon after that, so we waited to wax it until the next day so we could use the natural lighting to get the color just right. I got up and distressed the piece first (just the edges), followed by a coat of clear wax and dark wax on top. And now Mom has a beautiful bench for the master bedroom!


The 2nd makeover I have is a different kind of chest - a chest-of-drawers to be exact! This piece was once my great-grandmother's, and it has been everywhere with me. College, living with my roomies in Georgia, our first home in Michigan, and now back to Sweet Home Alabama! I was a little sad to see it go, so I went ahead and gave it a makeover so I could choose between keeping it and this piece for our bedroom.


As you can see, it turned out BEAUTIFULLY! I painted it Coco and Old White, and it's been aged with dark wax to give it an antique look. It took several days of thinking and comparing before we could choose between the 2 chests - but in the end the lighter one just worked better in our room. 


And so, this beauty is now FOR SALE! If you're in the Birmingham area (or willing to drive here) then this could be yours! She would make a great statement piece for a master bedroom, guestroom, or nursery. You can check out the Craigslist ad for more pictures and info! And if you tell me you saw this blog post, I'll even give you a $10 discount! :)

Tuesday, July 3, 2012

Furniture Makeover :: My Pretty Purple Table

As promised - here are the pictures from my 2nd furniture makeover (and the first one I did all by myself!)

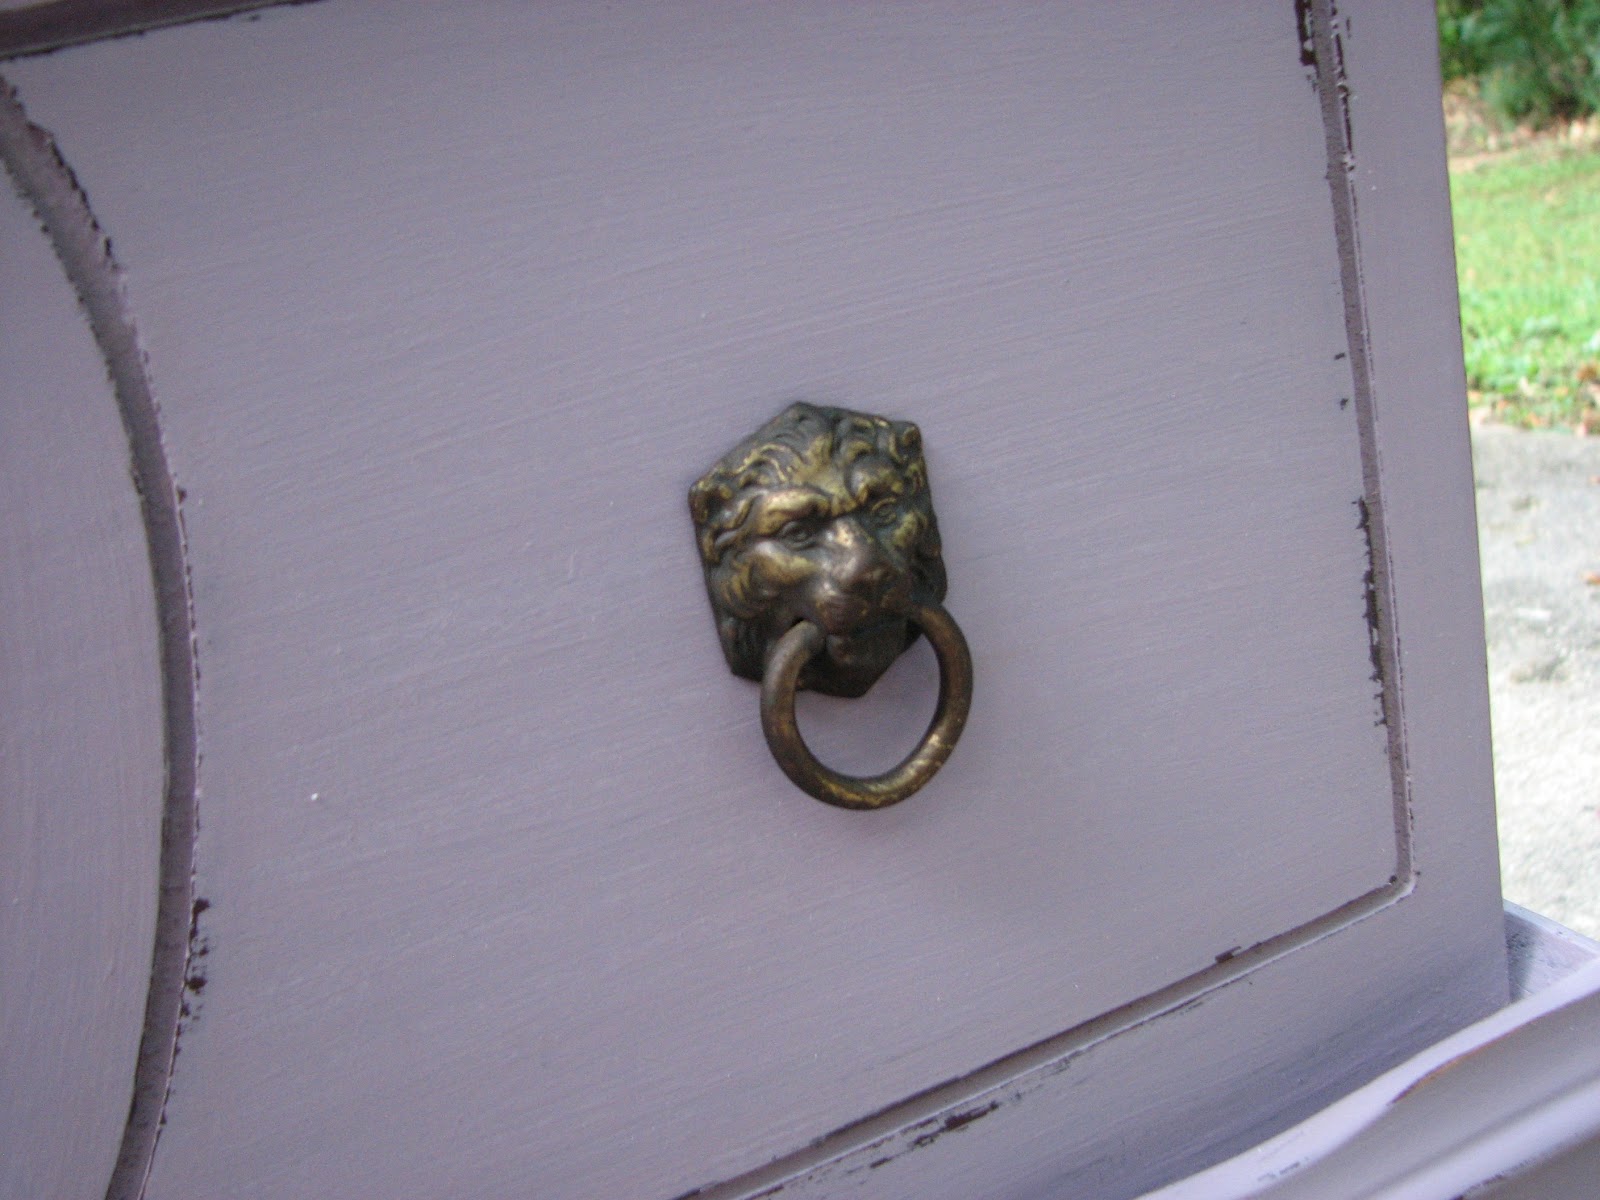
This piece started as a banged up end table that Rusty found for $10 back when we lived in Michigan. It used to sit in his "mancave" (ie - the basement) so I didn't care how bad it looked! I planned to send it back to the thriftstore when we moved, until I saw the pretty lion head hardware on each side and fell in love with the detailing! So we brought it to Alabama, and it's been part of an extra little sitting area in our living room ever since.


The problem though, is how beat up it looked! It's real wood, and while I wished I could bring the original finish back out there was no way I wanted to sand, strip, and re-stain the piece.


I did want to paint it black to match the chairs next to it, but to get a true match I'd have to hire the lady we bought the chairs from (and she charges more than I wanted to pay for an end-table).


So it sat, and sat, and sat.... and when I found out that Annie Sloan had a muted purple chalk paint, I thought - why not?! (We have purple throw pillows and some really cool antique purple art in our living room, so I figured it would work!) Since it's such a small piece, I was able to get by with just a sample pot ($11).

First I removed the hardware, wiped down the piece to get rid of any dust and dirt, and then I painted 2 coats of Emile colored chalk paint. It took a little longer than I expected because of all the crevices and details!


Next, I decided to distress the piece. I didn't want to "age" it with the dark wax, I just wanted a shabby look to it. Most people suggest doing this after you do the clear wax but I wanted to try it pre-wax. Because the paint is water-based, I decided to use a couple of techniques. In some areas I sanded it. In others, I rubbed a wet-wipe over the areas I wanted the paint to come off. Sometimes I did both (sanding followed by a wet-wipe). I found that when I sanded it, the natural wood showed through. When I just wet-wiped it, the darker finish (from it being stained/sealed) showed through. So I now have areas of light brown and a brownish/black peeking through the paint!

Of course I finished it with the clear wax, and buffed it after 24 hours. And here's the final piece!


And here it is back in my little sitting area, between my shabby black and burlap chairs! (Don't you love those gorgeous handmade pillow covers from India?!)


I haven't decided if I like it or not. I think the piece turned out beautifully - I'm just not sure if it really "goes" with my living room or if I should sell it and buy something else. I think I would like it more if the Emile were a little darker. But honestly I can't complain over such a quick, cheap makeover! It definitely looks better than the beat up piece it used to be!

Sunday, July 1, 2012

My First Furniture Makeover

Thanks friends for the prayers in regards to my last blog. I appreciate those of you who commented on my blog and facebook!  It always helps to know other people are praying!

Today I thought I'd do a lighter post to share my latest hobby with you all. I'm sure most of you have at least one friend (or one blog you read) that re-does furniture. If you're anything like me, then you drool over the Before & After pictures of their re-finished or painted pieces, all the while thinking - "There is NO way I would ever have the patience or know-how to do that!" For a while now I've been oohing and ahhing over several friend's furniture makeovers (like Erin's buffet & Katie's bench) and staring at project after project on the Fab Rehab and Roadkill Rescue blogs. But the idea of actually stripping and sanding and priming and painting a piece of my own was way too intimidating!

Until I met Laurie!

Laurie Peacock and I met at a marriage small group one night, and in her little "about me" intro she mentioned that she re-did furniture. So when I had finally HAD IT with my crappy chest-of-drawers, I called her for help. [*side note - Since Rusty and I are still renting a house, we've decided not to make any big furniture investments until we buy a house for them to permanently live in. That means we've still got miss-matched, hand-me-down thrift store/consignment store furniture everywhere! Most of the pieces are in pretty good shape, but our chest-of-drawers was definitely the roughest of the bunch. It's a cheap veneer hand-me-down I've had since college, and I reasoned that replacing it would remove the majority of the "ugly" from our bedroom!] Laurie encouraged me to buy this replacement Bassett chest that was a really good price from Craigslist, and graciously volunteered to come to my house and teach me her furniture fixin' tricks! When I heard that she used a *magical* paint that didn't require stripping, sanding, or priming - I was in!

BEFORE


The paint she introduced me to is called Annie Sloan Chalk Paint*, and it's nothing short of life-changing. This stuff will go on anything - wood, veneer, plastic, brass, metal, concrete, you name it! It has practically ZERO fumes, and washes off with water (even if you get it on your clothes!) It comes in a ton of gorgeous colors, and is super easy to use. When you use the paint though, you have to also buy the wax for a sealant. You can get just clear wax, or you can also buy the dark wax to layer on top of the clear wax. The dark wax is what will give your furniture an "aged"  or "distressed" look. All in all it's about $100 for 1 quart of paint, 1 clear wax, and 1 dark wax - but those 3 small cans will last you through 4 - 8 projects (depending on how big your pieces are). To me - it was totally worth the price to not have to strip, sand or prime!

I painted this chest-of-drawers with 2 coats of Old White chalk paint, and then Laurie came over the next day to help me with my first waxing job. Using a paint brush we coated the whole piece with clear wax, and then she immediately began brushing dark wax over it and rubbing it back off again (working in sections). If the dark wax got too dark, I would brush the dark area with my clear wax brush and she would rub the excess off. It was a pretty foolproof process!

When we were done with the dark wax we replaced the hardware and let it dry. 24 hours later I went back and buffed the piece with a wiping rag (an old t-shirt will work great for this!) And TA-DA!!!

AFTER


Isn't it GORGEOUS!? I love the way the detailing on the front pops with that dark wax! It gives it such a beautiful, aged look! I could not believe how easy this was, and how incredible the end result is. I just love seeing something old and tired transformed into something beautiful again!

So for those of you who are asking - here are my "tips" in case you'd like to try this *magical* paint for yourself!

#1 - Find a store near you that carries Annie Sloan Chalk Paint. It is only in a few select places (it's been sold in Europe for a while, but it's just started becoming available in the US!) This site should give you a list of places near you.

#2 - Buy yourself some paint, wax, at least 2 decent sized brushes (they don't have to be the Annie Sloan brushes - mine were only $2). I would also recommend a couple of smaller brushes for details. If you are doing a small piece - like a nightstand or end table - you might be able to just buy a sample pot ($12) instead of a full quart ($35) of the paint. You should also get a dropcloth, some cheesecloth (this is the best material for rubbing off the wax), and some rubbing cloths for buffing (these are like $2 at Lowe's and they are cut up t-shirt material. You can totally use an old t-shirt if you have one!)

#3 - Follow these instructions for applying the paint and wax. This is the best tutorial I've found! If you want your dark wax to show up more, you can use a "hatch stroke" when you paint (which is like criss-crossing brush strokes). Then the wax will catch in those places. I personally like to go with the grain and I always use 2 coats.  Be careful not to scratch your piece in between painting and waxing. The paint comes off super easy before it's sealed with the wax! (If you do scratch it - just repaint the area. The paint/wax combo is super forgiving :)

#4 - Wait 24 hours to buff. When you buff the piece, it is going to take some elbow grease, so be prepared!

#5 - It's okay if your piece still feels a little bit tacky in places after you're done. The info I've read says it takes a full 28 days for the paint/wax combo to "set" fully. But once you've buffed it, it should be perfectly fine to sit things on the piece and use it normally - just don't scrape any sharp objects into it. (Of course, you wouldn't do that to any painted piece, now would you?) If you're doing a table-top (or any piece that's used a lot) you may want to do a 2nd coat of clear wax.

If you're still not feeling brave enough to try this paint, but you love the look, then you should definitely check out Laurie's pieces for sale! She does this as a side job, and she has some gorgeous stuff for sale on Craigslist. Just type "French Urban" into the Birmingham Craigslist and her items should pop up! Or, if you have a piece at your house you'd like re-done, Laurie can do that too! Just contact her at calibamagirl@att.net for pricing and other examples of her work!

This GORGEOUS coffee table is just one of Laurie's beautiful pieces for sale! 


Stay tuned for more of these furniture makeovers! I have already done my 2nd piece and I can't wait to show it to ya'll! Happy painting friends!


*Chalk paint should not be confused with chalkboard paint. This is called chalk paint because of it's consistency - when it dries it feels like chalk. You can not write on it like a chalkboard.